Irrespective of the weather, I needed to sort out my irrigation system for the tyres once and for all. We're going to Cape Town for a few days at the end of next week, and I can't expect my house sitting youngest daughter to worry about the intricacies of keeping things alive.
The "rotating head" system I had in place was too wasteful of water, much of it going onto the pathways, and the issue was exacerbated by having too many heads in the irrigation run which reduced the pressure so that the coverage of the rotating heads was poor.
Anyway, I introduced another run in to the vegetable garden, which means there are now two. This allows an increase in the number of heads, which have been changed from rotating heads to ones that spit out two narrow channels of spray 180 degrees apart (using "blue" heads), ideal for a narrow bed or a double row of tyres.
It's an opportunity to show the building blocks of micro irrigation. There's two aspects to this, the micro irrigation heads themselves, and the main water distribution.
The individual components used to set up a spray head on a spike. They're very cost effective, even in quantity.
Sub assemblies put together.
That's it, other than attaching the 5mm flexible tube with barb on one end to the bottom of the 6mm riser on the spike. Using a cup of hot water to soften the flexible tube makes it easy.
Another sort of irrigation assembly - a drip irrigation button. There's two differnt buttons - 2 liters per hour (above) and 8 liters per hour. I'm not using any in the tyre veggie garden, but use them extensively with my black plastic bags.
The final assembled batch of five new spray heads with long risers to be installed. I'll link these together with four of the existing ones into a single new run, The old run will be reduced to 9 heads, and I'll add three sector heads ("red" spray heads) to adequately cover the asparagus beds. The pressure problem will also be improved by linking them all back drectly to a 15mm run, instead of T'ing them off long lengths of 5mm flexible tubing. i.e. doing things properly instead of in a rush.
The following components are used in setting up a 15mm irrigation run:
The 15mm PVC pipe is available in 100 metre rolls. I bought two, and have just started using my second. Missing is a 90 degree elbow. I've used lots of these in the past, but find you can usually make a plan to avoid them.
These fittings are amazing - no leaks once properly assembled, and virtually impossible to pull apart.
A home made insertion tool to hold the micro irrigation barbs. This is holding a barb in order to attach the flexible 5mm tubing.
This is what's required to attach an assembled irrigation head to the 15mm PVC run. Note the drip button can be attached directly to the 15mm pipe... and a 5mm tube attached to the output.
Correct size hole punched.
Barb + flexible tube in insertion tool, ready to be pushed into punched hole.
Done. On to the next one...
The gardening brains trust, showing signs of temperature fatigue.
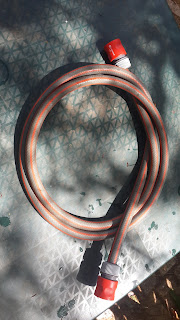
A hose pipe "tail", used to attach the PVC irrigation run to the Gardena Automatic Water Distributor.
As used. These are the old and the new veggie garden irrigation runs.
A Y piece used to link two outlets on the Gardena Automatic Water distributor to a single irrigation run.
Final step for today was testing for leaks (none), and adjusting the spray patterns. For later will be to revisit the Gardena water controller program to adjust spray durations.
An exhausting but rewarding day. Hope the vegetables appreciate the technology and the effort.
Update 2015/10/21:
Updated schedule - see Gardena Irrigation Controller.
Update 2015/11/11:
Discovered yet another compatible brand of micro-irrigation fittings at the Starke Ayres Garden Centre, Rosebank. That makes 3 manufacturers.
I prefer the ones sold by Builders Warehouse (better finish, more variety), but you use what you can get.
Update 2017/01/15:
A recent visit to Builders Warehouse in Port Elizabeth revealed they no longer stock the fittings I started off with, which means the Starke Ayres Garden Centre, Rosebank is currently the best source.
Pity they're so far away, but I've pretty much completed my irrigation layout, and there'll be minor extensions - mainly as regards fig trees in pots.


No comments:
Post a Comment